Back Up SQL Server Databases to an FTP Server
Looking for a quick way to back up SQL to FTP? With SQL Backup Master, you can easily automate and schedule backups to standard FTP, FTPS (TLS/SSL), or SFTP servers. Follow the steps below to configure and run your backup job, ensuring your data is kept safe offsite.
Step 1 – Create a Backup Job
In the main SQL Backup Master window, select the Backup and Restore tab, then click the Create new database backup toolbar button. The Database Backup Editor window will appear.
Give your backup job a unique name (and optionally a description). This makes it easier to identify in the future.
Step 2 – Connect to SQL Server
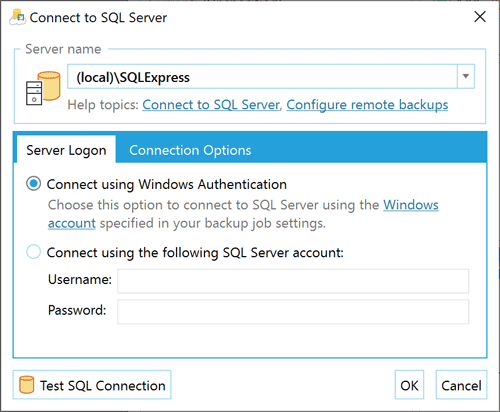
In the Database Backup Editor window, click the Choose SQL Server button. This will open the Connect to SQL Server dialog box:

In the Server name field, enter or select the name of the SQL Server instance to which you’re connecting. Common examples include:
- (local)\SQLExpress – The default SQL Express named instance on the local computer.
- (local) – The local SQL Server installation without an instance name.
- Server1\SQLExpress – The default SQL Express named instance on a remote computer named “Server1.”
- Server1 – An unnamed SQL Server instance on a remote computer named “Server1.”
TIP: You can also use the drop-down arrow of the Server name field to discover local and remote SQL Server instances. When ready, click Test SQL Connection to verify connectivity, then hit OK.
Step 3 – Select Databases to Back Up
Once you’re connected, the Database Backup Editor window displays a list of databases. Check the boxes for the databases you want to include in this backup job.
If you enable the Back up all non-system databases option, any new database created on the target SQL Server in the future will be included in backups automatically.
Step 4 – Add an FTP Server Backup Destination
Under the Destinations heading in the Database Backup Editor, click the Add toolbar button. The Choose Destination window will appear. Double-click FTP Server to proceed.
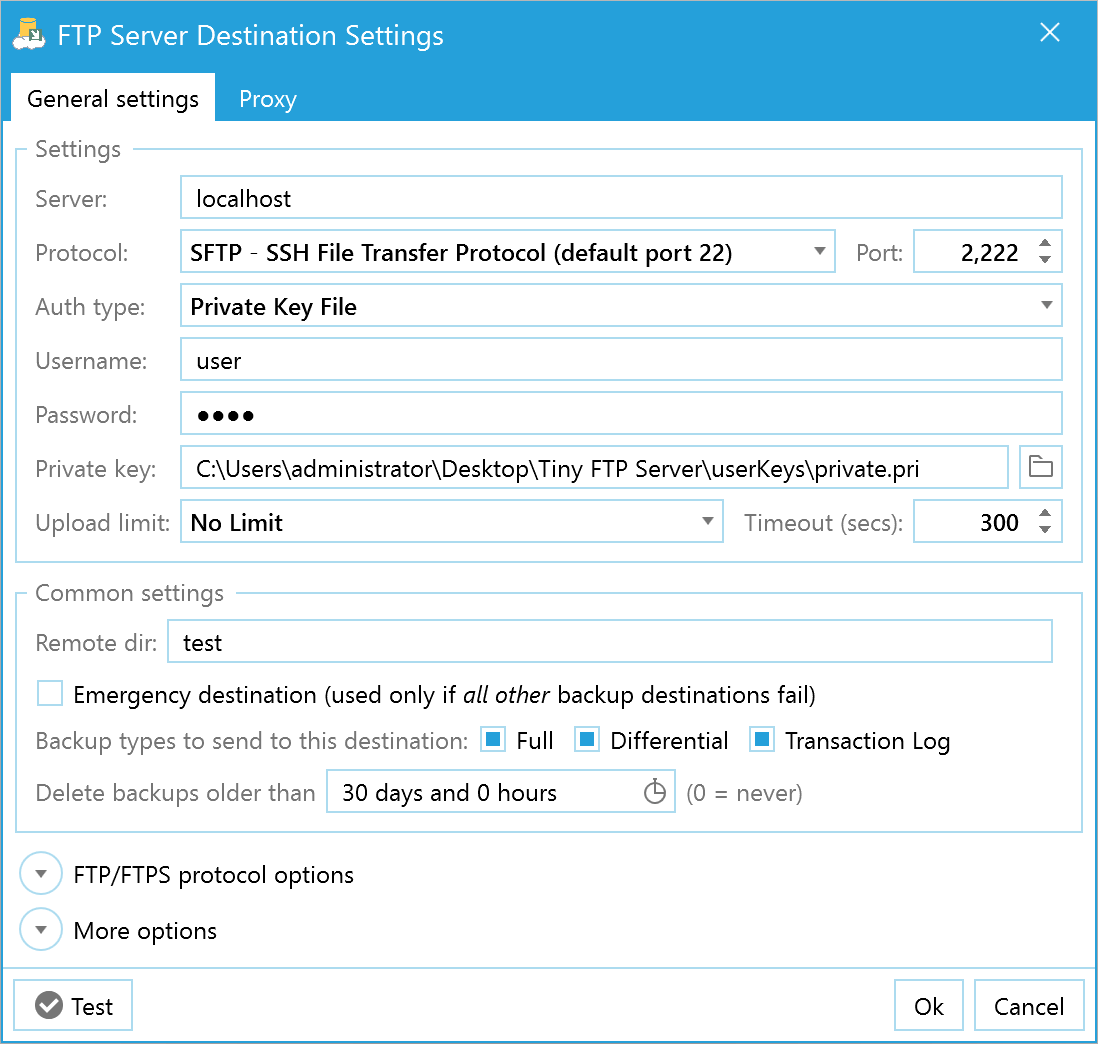
The FTP Destination Settings window will open. Provide details about the FTP server you want to use (such as the server host address, username, and password). You can also configure advanced settings for FTPS, SFTP (via SSH), or specific proxy options like SOCKS4 or SOCKS5.

Click the Test button to ensure SQL Backup Master can connect and upload to your FTP server. Once configured, click OK to return to the Database Backup Editor window. Finally, select Save to store your new backup configuration.
Congratulations! You’ve successfully configured your first SQL Server database backup using SQL Backup Master and an FTP Server destination.
Step 5 – Run the Backup Job
Back in the main application window, locate your newly created backup job and click Back up now to begin the process. If the job does not complete successfully, check the log file for detailed error information.
That’s it! You are now backing up your SQL database to FTP. By automating backups with SQL Backup Master, you’ll have peace of mind knowing your critical data is protected offsite and readily available for recovery.
If you’re looking for additional backup destinations—such as Dropbox, OneDrive, or Amazon S3—be sure to explore the full feature set of SQL Backup Master by Key Metric Software.
