Back up SQL Databases to Google Drive
Looking for a straightforward way to backup SQL data to Google Drive? Utilizing Google Drive as a backup destination ensures your databases are stored safely offsite. Follow this quick guide to configure SQL Backup Master to automatically back up SQL databases to Google Drive.
STEP 1 – CREATE AND SET UP YOUR GOOGLE DRIVE ACCOUNT
Open the Google Drive homepage and sign up or log in using the account best suited for your organization’s needs. Follow any prompts and provide the requested information. Ensure you have adequate storage space to hold your SQL database backups.
STEP 2 – CONNECT TO SQL SERVER
Open SQL Backup Master and click on Backups in the navigation center, then select New Backup. The Database Backup Editor window will appear. Within this window, select the Choose SQL Server tab. The Connect to SQL Server window will then open.
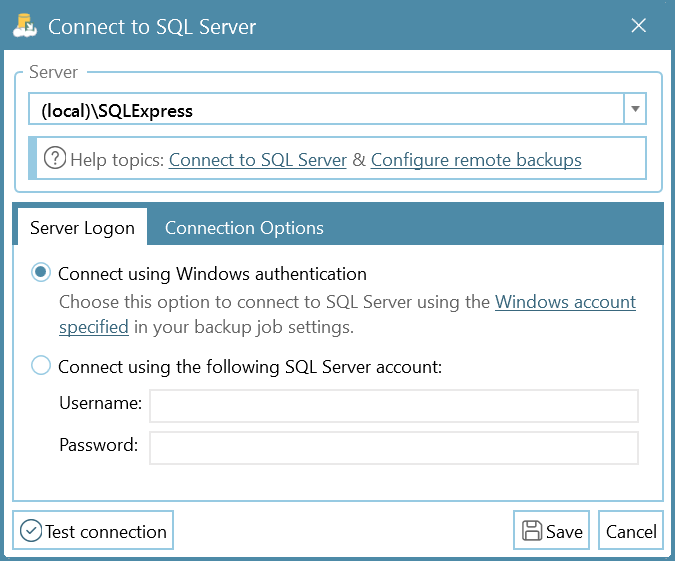
In the field labeled Server Name, select or enter the name of the SQL Server instance that you are connecting to. Common examples include:
- (local)\SQLExpress – Default SQL Express named instance on the local machine.
- (local) – Local SQL Server installation without a named instance.
- Server1\SQLExpress – Default SQL Express named instance on a remote computer named “Server1.”
- Server1 – An unnamed SQL Server instance on a remote computer named “Server1.”
TIP: Use the drop-down arrow next to the Server Name field to discover local and remote SQL Server instances automatically.
Click Test SQL Connection to confirm your connection, then click OK. Next, click the Save button (bottom-left).
When the Windows user account configuration notice appears, click Yes to continue. Then, check Run Backup with a Specific Windows Account and enter your authentication credentials (typically only needed once per backup job).
STEP 3 – SELECT DESIRED DATABASES TO BACK UP
After connecting to a SQL Server instance, the Database Backup Editor window will list available databases under Source. Select all the databases you want to include in this backup job.
TIP: Enable Back up all Non-System Databases to automatically include newly created databases on the target server going forward.
STEP 4 – ADD A GOOGLE DRIVE BACKUP DESTINATION
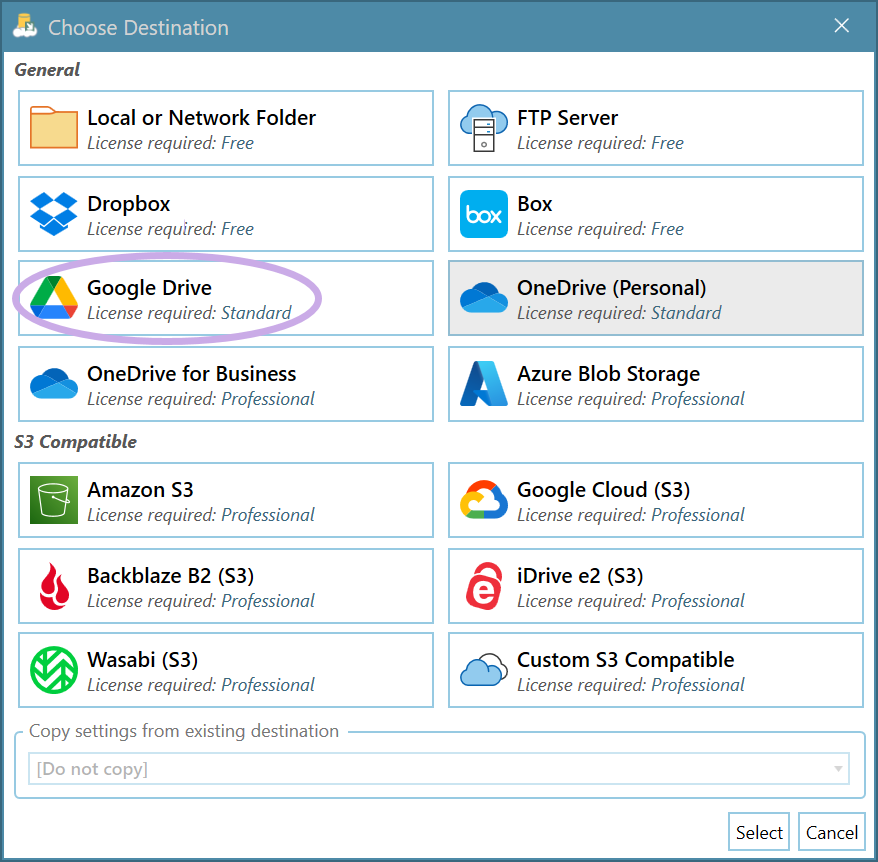
Under the Destinations header in the Database Backup Editor, click the Add button. A window will appear, listing all possible backup destinations supported by SQL Backup Master.
Double-click Google Drive (or select it and click Select) to choose it as your backup destination.
You will then see the Google Drive Destination Settings window, where you can authorize a connection to your Google Drive account.
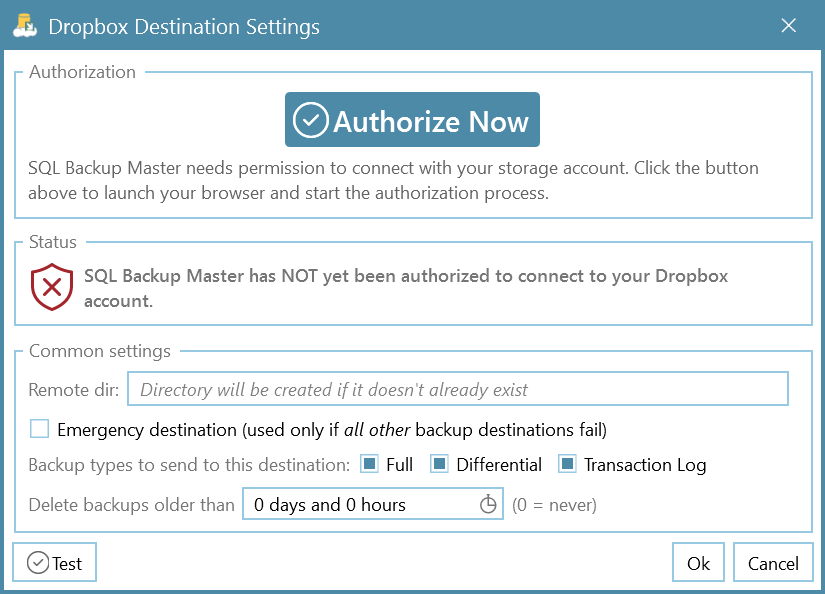
Select Authorize Now and sign in with your Google Drive credentials. Follow the prompts to grant SQL Backup Master permission to upload backup files to your Google Drive. You should see confirmation screens during the authorization process:
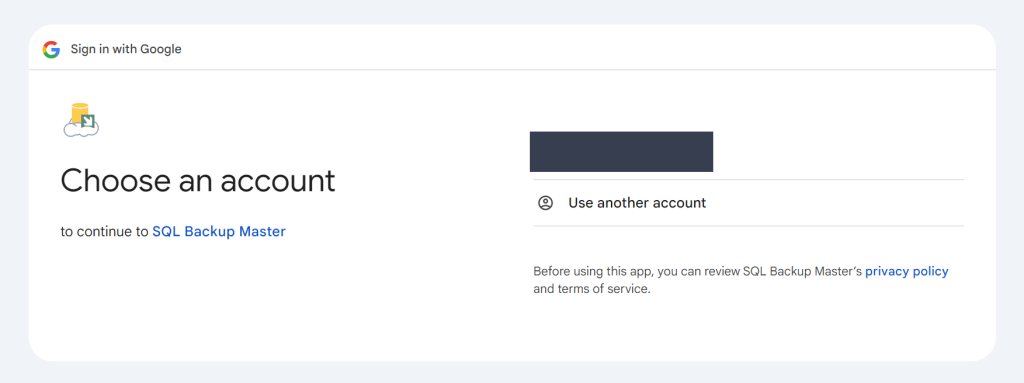
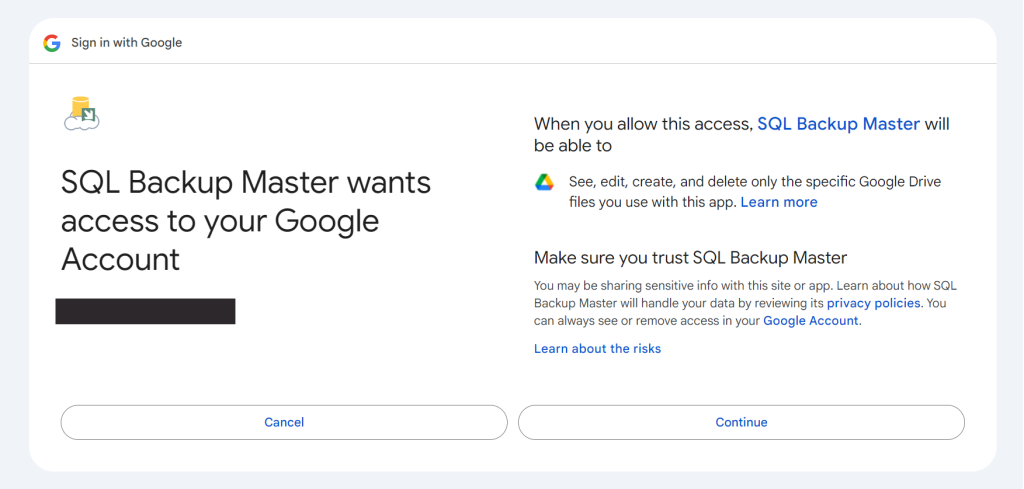
Click Continue when prompted. Once authorization is successful, you should see a confirmation screen similar to this:

STEP 5 – RUN THE BACKUP JOB
Return to the main window in SQL Backup Master, select your newly created backup job, and hit Back up now to begin backing up your databases to Dropbox. If the backup job does not complete successfully, consult the log file for more details on any errors.
If the backup job doesn’t complete successfully, review the application log file for error details or additional troubleshooting information.
That’s it! You are now backing up your SQL database to Google Drive. By automating backups with SQL Backup Master, you’ll have peace of mind knowing your critical data is protected offsite and readily available for recovery.
If you’re looking for additional backup destinations—such as Dropbox, OneDrive, or Amazon S3—be sure to explore the full feature set of SQL Backup Master by Key Metric Software.
STEP 1 – GOOGLE DRIVE ACCOUNT CREATION AND SETUP
To create a Google Drive account, navigate to the Google Drive home page and select the Sign up at no cost option near just under the Go to Drive button.
Next, enter your contact information and required credentials to create your account. Once your account is created, you will be taken to the Google Drive main page.
STEP 2 – CONNECT YOUR SQL SERVER
In SQL Backup Master, navigate to the Backup and Restore tab, here select the New Backup button. Then the Database Backup Editor window will open, select the tab labeled Choose SQL Server. This will bring up the Connect to SQL Server window:
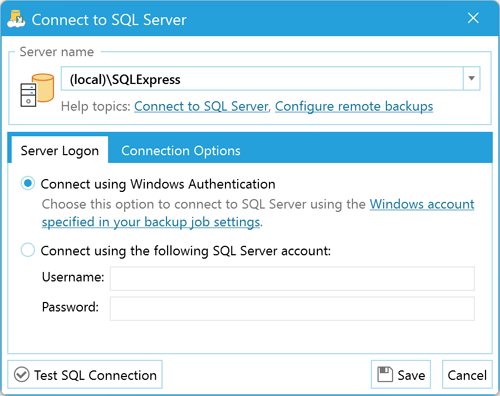
In the Server name field, enter or select the name of the SQL Server instance that you are going to connect to. Common examples include:
- (local)\SQLExpress – Specifies the default SQL Express named instance on the local computer.
- (local) – Specifies the local SQL Server installation (without an instance name).
- Server1\SQLExpress – Specifies the default SQL Express names instance on a remote computer named “Server1”.
- Server1 – Specifies an unnamed SQL Server instance on a remote computer named “Server1”.
Use the Test SQL Connection button to test your connection, then hit Ok.
STEP 3 – SELECT DATABASES TO BACK UP
Once you’ve properly connected to a SQL Server instance, the Database Backup Editor window will display all available databases under the Source label. Select the database(s) you want to include in this backup job
Checking the box labeled Back up all non-system databases will back up all new databases created on the target SQL Server in the future automatically.
STEP 4 – ADD A BACKUP DESTINATION
Click the button labeled Add under the window header labeled Destinations. This will bring up a window displaying all compatible backup destinations for your SQL Database:
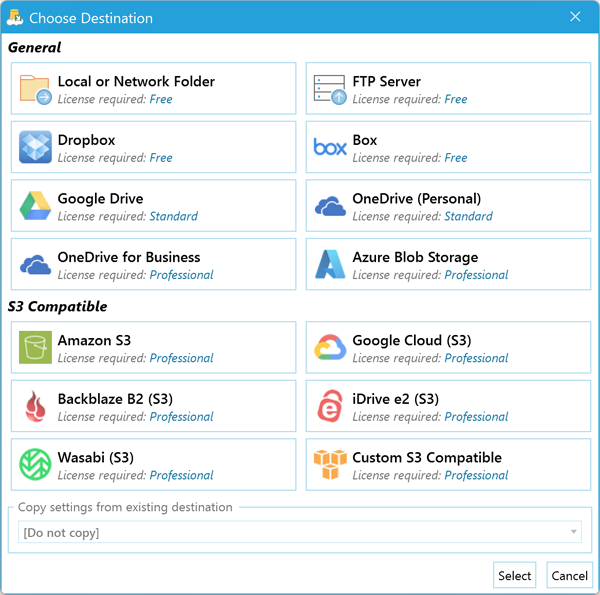
Choose Google Drive by double-clicking the Google Drive selection box.
After choosing Google Drive as your destination, the Google Drive Destination Settings window will appear. This is where you establish a connection to Google Drive. Click on the Authorize Now button and input your Google login information on the new window.
Signing in to your Google account through the browser will bring up the following window:

Select the Allow option then close the window to continue.
You can use the Test button in the bottom left corner of the Google Drive Destination Settings window to verify that you have a successful connection to your desired Google account, select Ok, then click the Ok button on the main window to continue.
Back at the bottom right corner of the Database Backup Editor window, use the Save button to establish your backup destination.
STEP 5 – RUN THE BACKUP JOB
Back in the main window of the application, select your newly created backup job and use the Back up now button to begin backing up your SQL Server to your Google Drive.
If the backup job does not complete successfully, please review the log file for further details on the failure.